Creating a decision framework doesn't have to be complex. With low-code tools, you can simplify decision-making processes while fostering collaboration between business and IT teams. Here's the key idea: low-code platforms let you visually design decision logic, making it easier to map out rules, test outcomes, and scale efficiently.
Key Takeaways:
- What It Is: A decision framework organizes complex decisions into clear, actionable steps using tools like flowcharts or decision trees.
- Why Low Code?: Low-code platforms reduce development time by up to 90%, enabling faster updates and easier collaboration.
- How to Start:
- Define goals, stakeholders, and data inputs.
- Choose proprietary low-code platforms that match your needs (e.g., scalability, integrations).
- Build logic visually, test thoroughly, and gather feedback.
- Deploy in phases, starting with a pilot, and refine over time.
Low-code decision frameworks are practical for tasks like loan approvals, workflow automation, or pricing strategies. They save time, reduce errors, and improve consistency.
Pro Tip: Use resources like the Low Code Platforms Directory to find tools tailored to your needs, ensuring long-term scalability and performance.
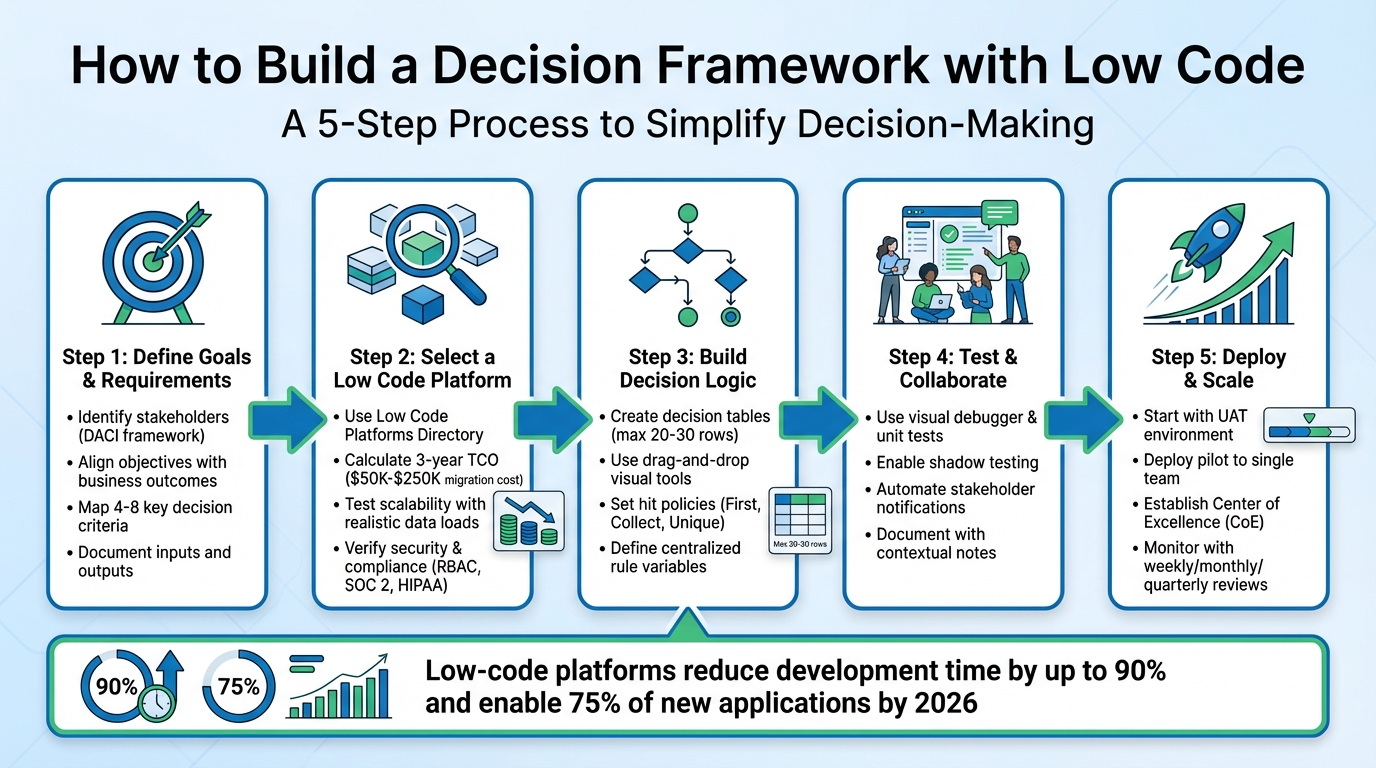
5-Step Process to Build a Decision Framework with Low Code
Low-Code Explained in 3 minutes
sbb-itb-33eb356
Step 1: Define Your Decision Goals and Requirements
Before diving into a low-code platform, make sure you’ve clearly defined your goals. This starts with figuring out who should be involved, what you want to achieve, and the data that will guide your decisions. Skipping this step is like trying to build a house without a blueprint. Break down roles and data flows to ensure every input aligns with your objectives.
Identify Stakeholders and Objectives
Involving the right people is crucial, but don’t overcomplicate things with too many stakeholders. A structured framework like DACI (Driver, Approver, Contributors, Informed) can help keep things organized. Here’s how it works:
- Driver: Responsible for creating the framework.
- Approver: Makes the final decisions (and there should only be ONE Approver per decision).
- Contributors: Provide expertise and input.
- Informed: Stay updated on decisions but don’t actively participate.
If you can’t pinpoint a single person accountable for final sign-off, that’s a governance issue, not just a decision-making challenge.
Next, align your objectives with specific business outcomes. For example, are you aiming to reduce approval times from days to hours? Or is your focus on cutting costs, like reducing developer hours or training expenses? Maybe you want to improve compliance by creating clear audit trails. If agility is your goal, you could aim to shorten application delivery timelines from months to weeks. Whatever the objective, document it clearly and get your Approver’s sign-off.
Map Decision Inputs and Outputs
Identify the data sources, criteria, and outcomes that will drive your decision-making framework. Inputs might include CRM customer data, ERP financial records, or real-time inventory updates. Outputs could range from automated decisions to prioritized tasks.
Stick to 4–8 key criteria to avoid overcomplicating things. Too many criteria can dilute focus and create unnecessary fatigue. Define each criterion with precision. For example, if “cost” is a factor, specify whether it refers to upfront costs, total ownership expenses, or maintenance fees. Similarly, if “reliability” is important, clarify whether you’re tracking uptime percentages, mean time between failures, or vendor SLA commitments. This level of detail ensures everyone interprets the criteria the same way, avoiding confusion and conflicting evaluations.
Step 2: Select a Low Code Platform
Once you've outlined your decision goals and inputs, the next step is finding a low-code platform that fits your specific needs. The key is to choose a platform that aligns with your team's technical expertise, budget, and scalability requirements while supporting your long-term objectives.
Using the Low Code Platforms Directory
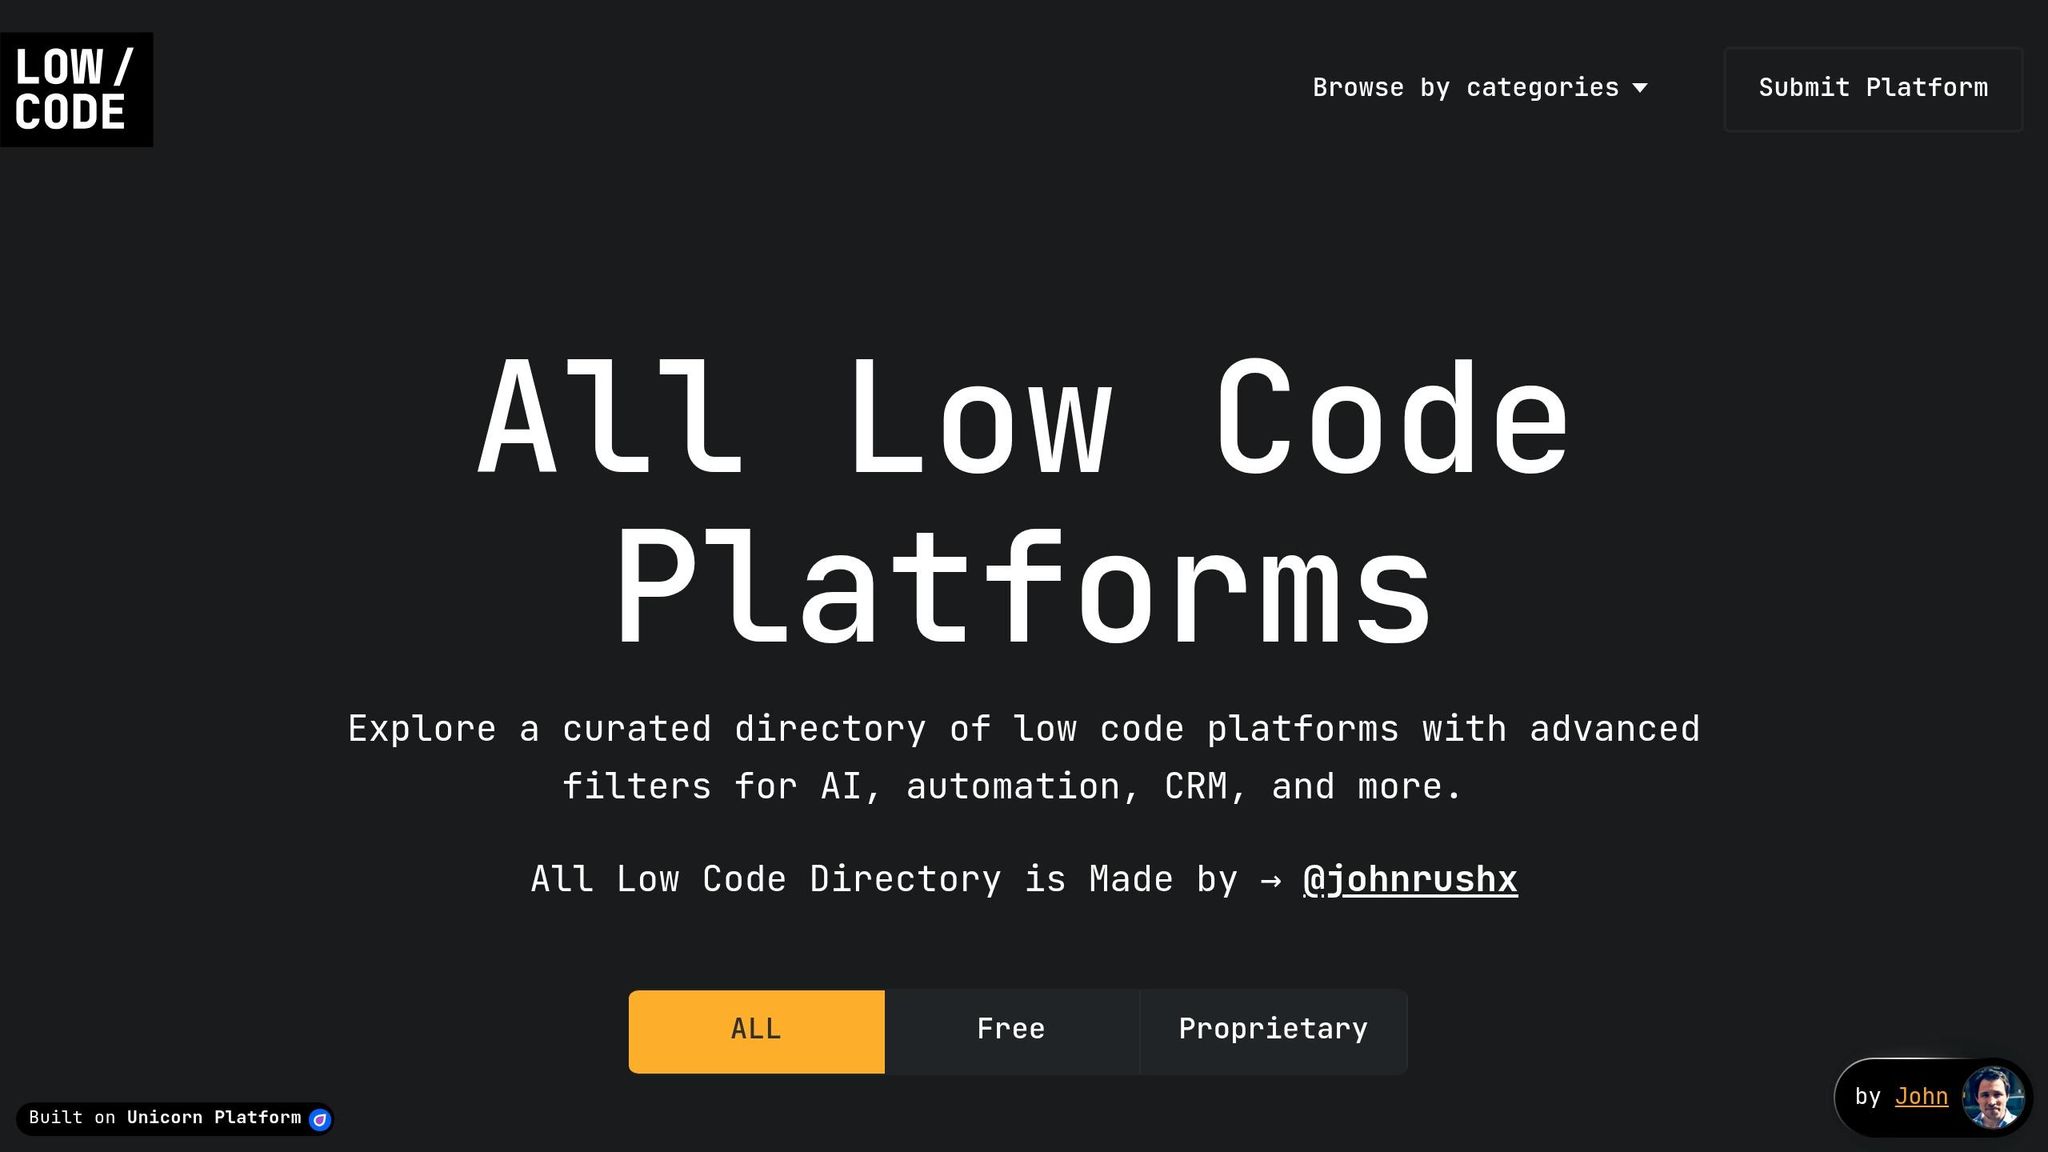
The Low Code Platforms Directory (https://lowcodeplatforms.org) is a helpful resource for narrowing down your options. It allows you to filter platforms based on the features and technical requirements that match your framework. Platforms are grouped into three categories:
- No Code: Requires no programming knowledge.
- Low Code: Offers visual tools with optional code extensions.
- AI Code: Generates production-ready code using AI.
If your decision framework involves complex workflows, automated approvals, or AI/ML integrations, look for platforms with decision logic and intelligence features. The directory also highlights platforms with integration capabilities, making it easier to find tools that connect to systems like SAP, PostgreSQL, or MongoDB. This is crucial for pulling real-time data from existing systems, which often forms the backbone of effective decision-making.
With visual development tools projected to power 75% of new applications by 2026, you're part of a growing trend. However, keep in mind that 25–30% of no-code projects are rewritten in custom code within two years due to scalability or performance challenges. To avoid this, use the directory to compare platforms on vendor lock-in - some platforms allow more control and code export options than others.
Platform Selection Criteria
Choosing the right platform means aligning its features with your decision framework's requirements. Here's what to consider:
- Cost Analysis: Calculate the three-year Total Cost of Ownership (TCO), including per-user fees, usage-based costs (like workload units), and potential migration expenses. Migrating from a no-code platform to custom code can cost anywhere between $50,000 and $250,000.
- Scalability Testing: Test the platform with realistic data loads. An app that works well with 100 records might struggle with 10,000. Ensure the platform can handle growing user demands without performance issues.
- Security and Compliance: Look for features like role-based access control (RBAC), data encryption, and compliance with standards such as SOC 2 or HIPAA, especially if you operate in a regulated industry.
- User Interfaces: Platforms that offer separate interfaces for technical and non-technical users can improve collaboration. For example, business teams can manage rules while IT focuses on security and system integrations within the same environment. An IDC study found that business users working with the Bizagi platform achieved 73.1% greater efficiency.
- Reusable Components: Platforms with pre-built templates for forms, business rules, and workflows can save significant time and ensure consistency across your decision framework.
Step 3: Build Your Decision Logic
Once you've chosen your platform, the next step is to create your decision logic. This is where low-code tools excel - they simplify what could be hundreds of lines of code into visual, easy-to-follow structures. These tools make it possible for both technical and non-technical team members to understand and refine the logic. Essentially, you're translating your criteria into a clear, visual framework.
Create Decision Tables and Rules
Decision tables serve as the backbone for many low-code platforms. Think of them as spreadsheet-style tools that map inputs to outputs. For instance, in a loan approval system, one row might state that applicants with a credit score above 700 and an income over $50,000 qualify for automatic approval.
"Decision tables transform layers of decision rules into a simple, structured table, making it easy to navigate complex logic without getting lost in the details." - Fernando Doglio, Camunda
To make these tables work effectively, you need to understand hit policies. These policies determine how the system handles cases where multiple rules match the input data. Some common options include:
- First: Stops at the first match.
- Collect: Returns all matching rules.
- Unique: Ensures only one rule is valid.
Order your rows from the most specific rules to broader, catch-all conditions. Always include a catch-all row at the bottom with empty conditions to handle unexpected inputs. This ensures your system won’t fail or return empty results when no specific rules apply.
Keep your decision tables manageable. If a table grows beyond 20–30 rows, consider breaking it into smaller tables or using a switch node to direct data to separate processing paths. For values that change frequently, define them as centralized rule variables. This way, you only need to update them once, making maintenance easier.
Use Drag-and-Drop Tools
Low-code platforms typically feature a visual canvas where you can build decision logic by dragging and connecting nodes. For example, you might drop in a decision table node, link it to your data sources, and connect the output to downstream processes.
| Node Type | Purpose | Best Use Case |
|---|---|---|
| Decision Table | Spreadsheet-style logic | Handling multiple rules with specific conditions |
| Expression | Data transformation | Calculating values or reshaping data |
| Function | Custom logic | Complex calculations or external API calls |
| Switch | Data routing | Directing inputs to different processing paths |
For clarity, arrange nodes left to right to maintain a logical flow of data. Group related operations together to make your structure easy to follow. Use descriptive names for nodes and column labels - terms like "Credit Score" or "Customer Type" are much clearer than generic names like "Input1" or "Field_A". If multiple nodes feed into one output, ensure each has unique field names or paths to avoid overwriting data.
Most platforms also provide simulators where you can test your logic using sample JSON data. These tools allow you to trace exactly which rows matched and why. Testing like this is crucial - it helps catch errors or conflicts in your logic before deploying it to production.
Step 4: Test and Collaborate
After creating your decision logic, it’s time to validate it and gather input from your team. Testing helps catch mistakes before they escalate into bigger problems, while collaboration ensures the framework addresses the challenges your stakeholders face. Low-code platforms simplify these processes with tools like visual debugging and built-in collaboration features.
Test and Validate Your Decision Logic
Once your decision logic is ready, the next step is thorough testing and refinement, ideally with input from your team.
Leverage tools like the visual debugger and automated unit tests to quickly identify errors and confirm outcomes. These tools often include centralized dashboards and color-coded logic paths, making it easy to see which rules passed or failed based on your input data.
"Testing is important because it helps catch logic errors, ensures data is handled correctly, reveals broken workflows, and reduces production risk." - Decisions.com
For more complex, high-volume logic, use sampling mode to record data from specific iterations, such as the first two and last three runs. This approach minimizes memory usage while still helping you spot failure trends. For instance, Decisions version 9.11, introduced in May 2025, allows sampling configurations for anywhere from 5 to 100 iterations.
Before you finalize your logic, double-check your hit policy settings. These settings determine how rules are applied during live execution, so it’s crucial they align with your intended outcomes. To further refine your framework, consider shadow testing - a technique that lets you compare rule versions and simulate outcomes without impacting your production environment.
Enable Team Collaboration
Once the technical aspects are validated, shift focus to ensuring the framework aligns with user needs through collaborative feedback.
Bring your team into the review process to identify any gaps or ambiguities in the decision logic. Start with a basic, single-stage framework and test it over a short period, such as one week. Monitor where users encounter issues or have questions, and refine the logic accordingly before introducing additional complexity.
Automate notifications for stakeholders using tools like Slack, Discord, or email. These alerts can flag decisions requiring manual review or highlight failed tests. To avoid bottlenecks, implement escalation rules that automatically reassign tasks if someone doesn’t respond within a set timeframe. Many platforms also offer plain-language summaries of tests or deployments, making it easier for non-technical stakeholders - like product managers or security teams - to provide informed approvals without diving into technical details.
"The goal isn't to automate approvals - it's to make the humans doing the approving faster, better-informed, and less annoyed." - SlackClaw
Use contextual documentation features, such as notes columns in decision tables, to provide descriptions, examples, or reminders for team members. This ensures everyone understands the purpose behind each rule. For teams using multiple tools, look for platforms that integrate with systems like Jira, GitHub, or Notion. These integrations can display relevant ticket summaries or data directly within the testing interface, saving time and reducing the need to switch between applications.
Step 5: Deploy and Scale Your Framework
After thorough testing and collaboration, it’s time to deploy your decision framework and prepare it for scaling. Here's how to ensure a smooth rollout and long-term success.
Deploy the Decision Framework
Start by deploying your framework in a UAT (User Acceptance Testing) environment. This step allows for final testing before going live. Make sure to complete a detailed pre-deployment checklist, which should include:
- Removing placeholder text
- Testing all external links
- Activating analytics tracking
- Ensuring legal pages are live and accessible
Begin with a pilot deployment, focusing on a single decision or a specific team. This approach helps you gather practical feedback and validate outcomes through a human-in-the-loop review process.
"The goal is not to build AI agents. It is to improve how decisions are made." - Greg Lakloufi, Head Service Strategy & Design, Slalom
Integrate the framework into existing workflows using pre-built connectors, APIs, or automation tools like Zapier or Make. Host the framework on a dependable platform that supports dynamic scaling, offers SSL certificates, and provides automatic backups. Don’t forget to set up uptime monitoring to receive alerts in case of any downtime. Additionally, maintain a database to log every recommendation, override, and outcome, creating a historical record for future improvements.
Once the pilot shows positive results, you can shift focus to scaling and maintaining the framework for broader use.
Plan for Scalability and Maintenance
For larger frameworks (those with over 50 screens), consider using a model-driven architecture. This ensures consistent performance while allowing for scalability. Design with modular, reusable components and templates to streamline development and maintain uniformity as you expand the framework across departments. Leverage cloud platforms like Azure or AWS to handle distributed processing and support thousands of users without requiring major architectural changes.
Establish a Center of Excellence (CoE) to guide the framework’s growth. The CoE can standardize practices, provide training, and conduct architectural reviews to prevent inefficiencies. Schedule regular maintenance, including weekly functional checks, monthly audits, and quarterly security reviews. Use analytics tools to monitor response times and pinpoint bottlenecks. Techniques like asynchronous processing can significantly improve workflow speed, reducing response times from 30 seconds to under 2 seconds.
Real-world examples highlight the effectiveness of these strategies. For instance, in 2025, Aon Brazil CRS, an insurance brokerage, replaced manual claims tracking with a PowerApps-based system. This automated solution captured cases and tracked metrics in real time, improving team productivity and capacity planning. Similarly, Nsure.com adopted a Power Platform solution to manage over 100,000 monthly customer interactions. This reduced manual processing by over 60%, increased revenue, and lowered operational costs.
"Low-code development principles form the foundation of a scalable enterprise low-code strategy that balances speed, governance, and long-term maintainability." - Robert Moczulski, TTMS
Documentation and training are essential for ongoing success. Treat your decision framework as a living system that evolves over time. Use in-app surveys, analytics, and direct stakeholder feedback to identify areas for improvement. By 2026, Gartner projects that 80% of low-code users will operate outside traditional IT departments, emphasizing the need for accessible tools and continuous refinement.
Conclusion
Low-code decision frameworks simplify team decision-making with structured, transparent processes. By setting clear goals, choosing the right platform, designing visual logic, testing collaboratively, and deploying with scalability in mind, you build a system that evolves and improves over time.
These frameworks bring several advantages. For instance, low-code methods can cut development time by up to 90%. They also provide greater transparency by centralizing decision logs, which helps avoid repeated debates or "silent reversals." Additionally, frameworks like DACI or RAPID can be embedded directly into workflows, ensuring clear accountability while reducing reliance on IT teams. This allows business users to quickly update rules as needed.
"This composable, low-code approach allows the rapid creation of use case specific analytic applications that can be developed in an agile manner and easily modified / refined, reducing costs and reducing the time to a functional application that can improve your business." - Mike Durran, Analytics Product Manager, Oracle
To get started, consider piloting a recurring decision, such as feature prioritization or vendor selection, over a 4–6 week period. Include fields for context, options considered, and rationale to prevent rehashing decisions later. Set up automated review triggers at 30, 60, or 90 days to assess whether the outcomes align with expectations. Tools like the Low Code Platforms Directory (https://lowcodeplatforms.org) can help you find platforms tailored to your needs, whether for automation, AI integration, or workflow management.
Think of your decision framework as a dynamic system. Regularly log outcomes, evaluate performance, and refine your processes. With proper governance, maintenance, and feedback, your low-code decision framework can continue delivering results well into the future.
FAQs
What’s the fastest decision to pilot first?
When it comes to quickly testing a new process, the best approach is to start with something straightforward and impactful. For instance, you might begin by tracking internal decisions or setting up a simple approval workflow. These manageable tasks let you test your framework without overcomplicating things. Plus, you'll gather useful insights and build confidence, making it easier to scale up to more complex situations later on.
How do I prevent rule conflicts in decision tables?
To keep decision tables in low-code frameworks free of conflicts, it's essential to ensure rules are mutually exclusive and conditions are clearly defined. Start by organizing your vocabularies and rules in a systematic way - this makes it easier to catch overlaps before they become an issue.
Thorough testing is another key step. Simulate different scenarios to spot any conflicts early on. Additionally, visual tools can be incredibly helpful for reviewing rule coverage, giving you a clear picture of how your framework operates.
By following these practices, you can maintain accuracy and avoid contradictions in your decision-making process.
How do I avoid vendor lock-in with low-code?
To steer clear of vendor lock-in, opt for low-code platforms that emphasize flexibility. Look for features like open APIs, support for open data models, and seamless integration with external tools. These elements make it easier to adapt and maintain control over your workflows.
It’s also smart to ensure the platform allows you to export both data and code, giving you the freedom to transition if needed.
Another strategy is adopting a hybrid approach - use different tools for different projects. This reduces dependency on a single vendor and keeps your options open for future changes.